Table of Contents
Add a Step to a Campaign
By adding a step to a campaign you can customize it to meet your needs. For example, you can insert an email into one of the pre-built campaigns in the library, add a customized direct mail design, or even create a new campaign that only has activities - the choice is yours.
What is a campaign step?
A campaign step can be an email, a direct mail piece, or an activity.
Add a Campaign Step
When creating or editing a campaign, you will be brought to a page where you can edit parts of the campaign. At section 2 on this page, Review and Configure Steps, click on the Edit button.

Click Add Step.

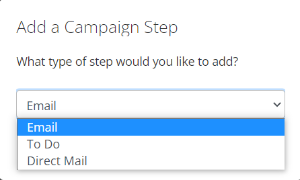
Select which type of step you would like to add.
- Email steps
- Activity steps
- Direct Mail steps
Then, click Add Step.
Email Step
When you select Email as the step you would like to add, you will be taken to your Marketing Center. You’ll be able to view all campaign enabled designs, which will already be filtered to show only Email materials.
You can choose to add:
- A new email design
- A saved email design
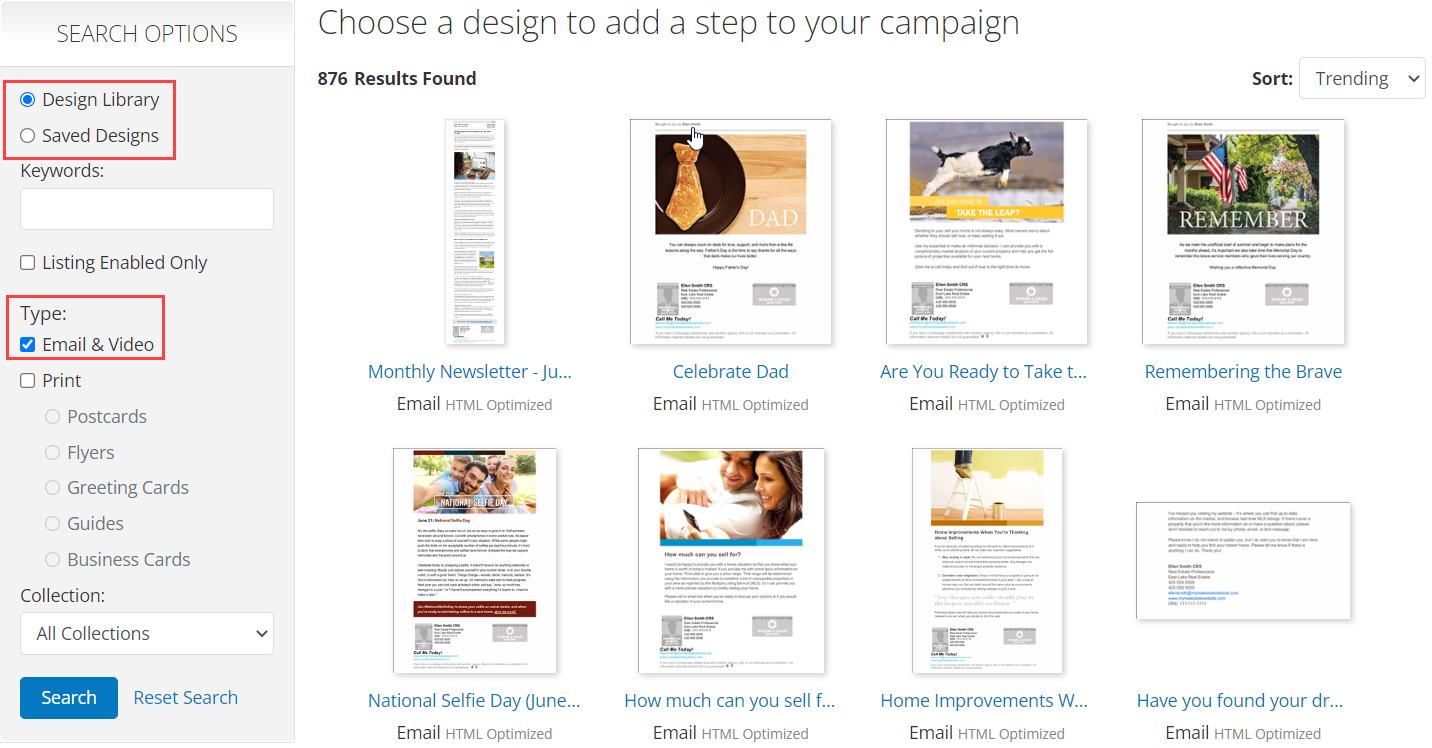
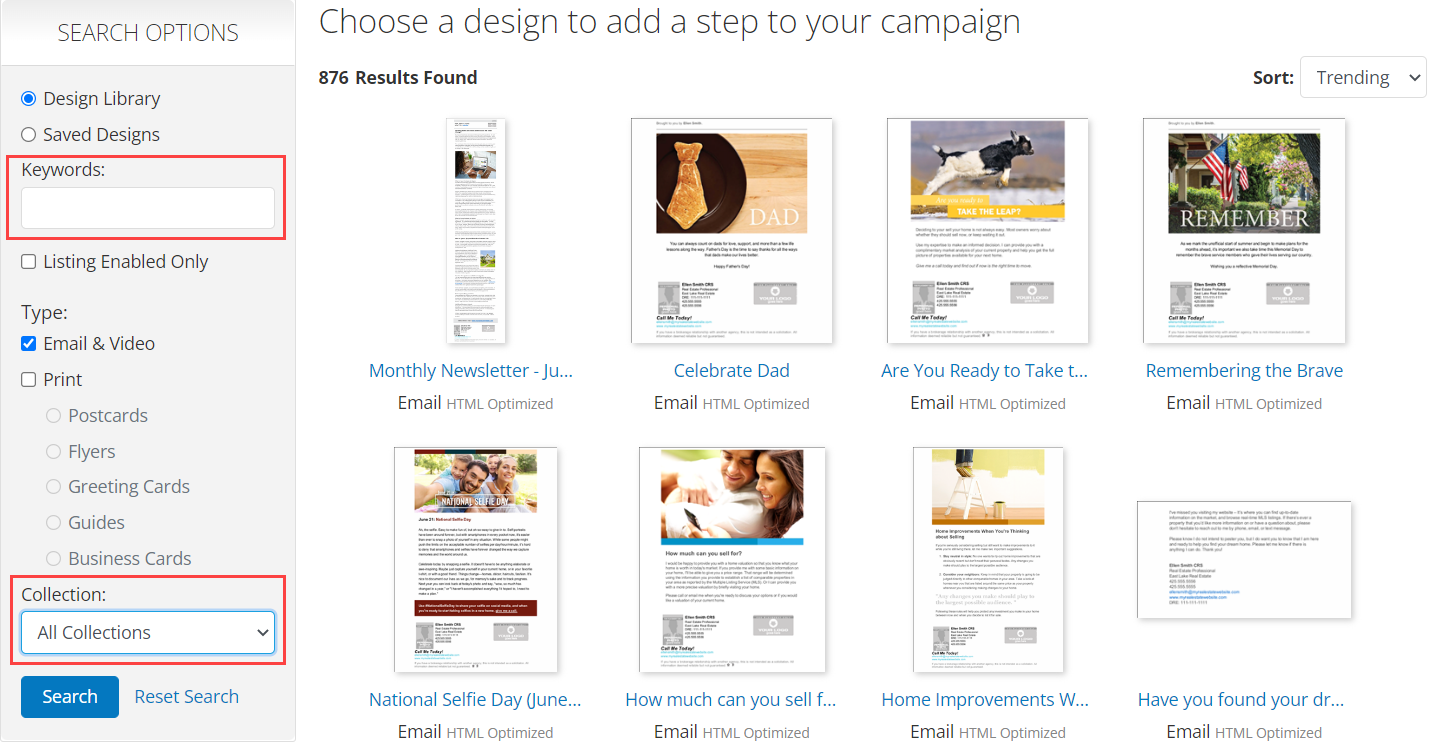
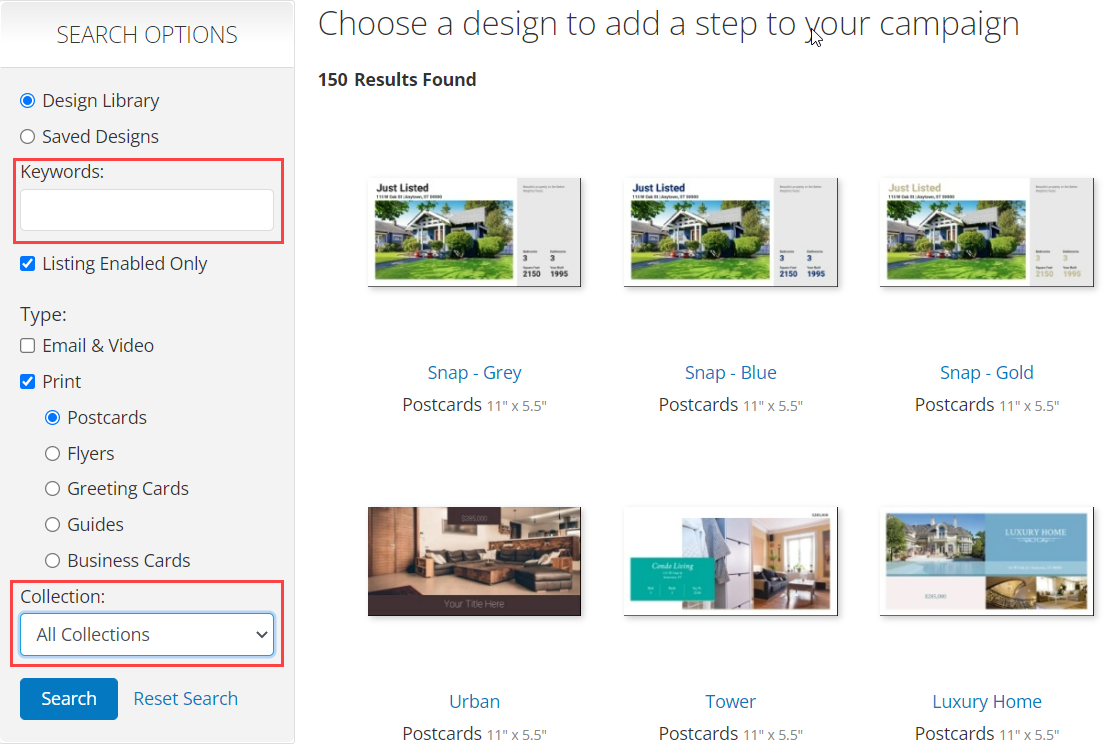
Narrow your search with the Search Options box. This will let you filter your results by keyword or title and/or Collection. When finished, select Search. A collection is a group of similarly themed designs.
To add a new email step
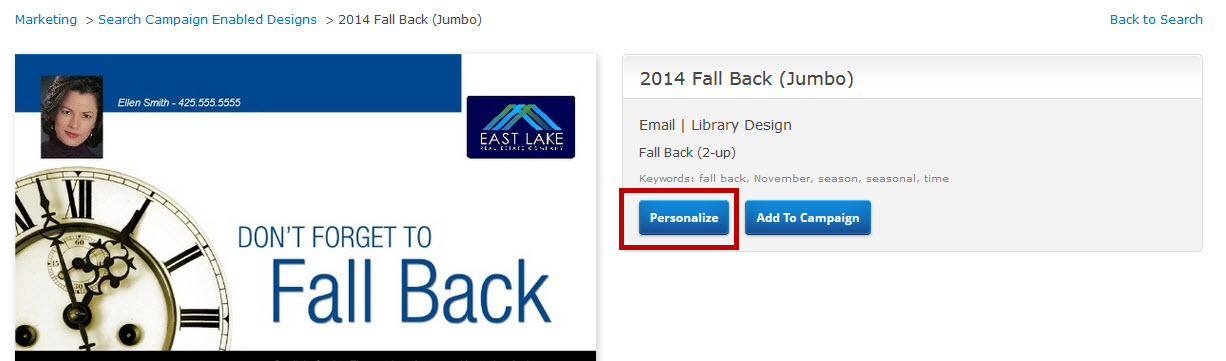
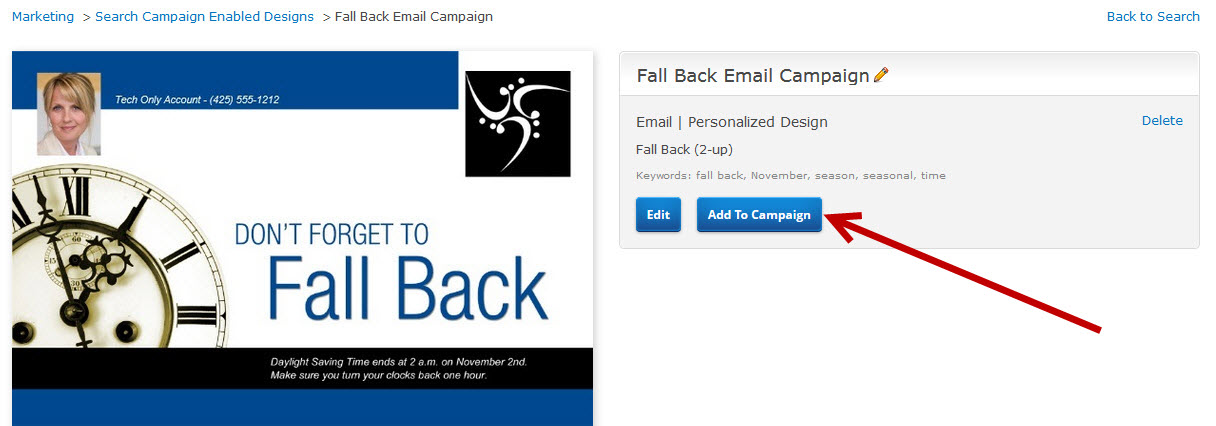
When you see an email design that you want to use, click the image for the email design and you’ll be taken to the detail page for that design.
To add this step to the campaign without any edits, click Add to Campaign.
To customize the design before adding it to your campaign, click Personalize. You will be taken into the marketing design editor.
The page Macro Save a Marketing Design does not exist.
After editing and saving your design, you will be returned back to this page where you can now add your saved design to your campaign. Click Add to Campaign.
To add a previously saved email design
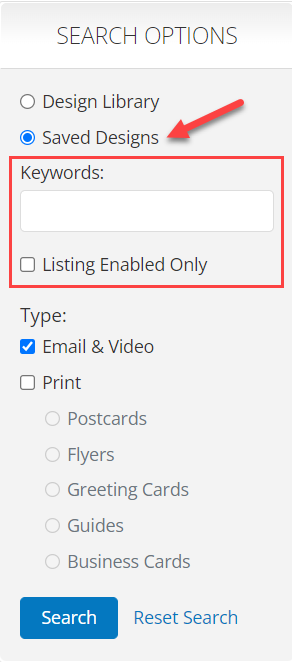
To add an email design that you have saved previously, click the My Saved Designs radio button.
You can filter the list further by:
- Showing Listing Enabled Designs only
- Entering a keyword or title for one of your saved designs
Click Search to view the results.
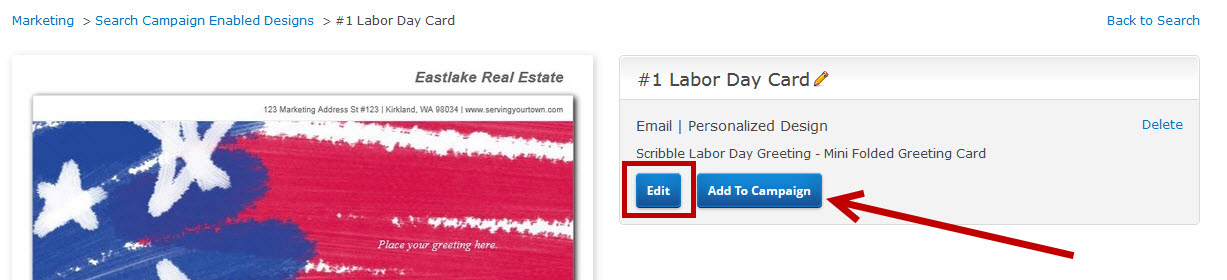
Click the image for the design you want to add and you’ll be taken to the detail page. To make changes to this design, click Edit.
To add the design to your campaign with no changes to the design, click Add to Campaign.
Activity Step
When you add an Activity step, the activity will be added to the end of your campaign as a default. You’ll be able to identify if this activity is a:
- Task
- Meeting
- Phone Call
Each activity type will trigger a reminder, which will appear on your Dashboard as well as on your To Do page (To Do tab).
Choose a reminder type based on whether or not you want the activity to be tied to a specific contact.
- Task: general reminder, not tied to a particular contact
- Meeting: reminder is tied to a specific contact
- Phone Call: reminder is tied to a specific contact
In general, if you want to schedule a reminder for yourself to do something, choose task. If you want to be reminded to do something with specific contacts on a campaign, choose meeting or phone call.

Each activity will have:
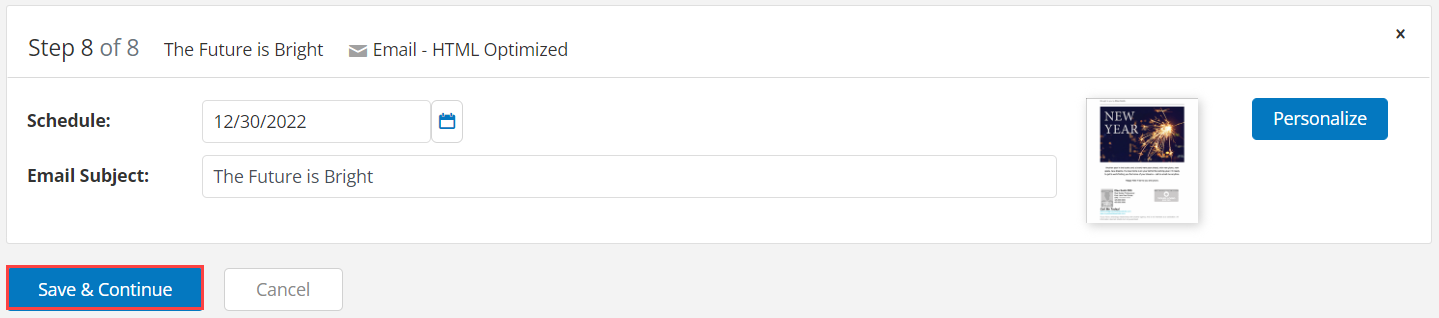
- Schedule: Day/date the piece is scheduled to be sent
- Date campaign: The date of the activity
- Interval campaign: Number of days after the prior campaign step this activity will occur
- Subject: Give your activity a subject. Ex. “2
Day Phone Call” - Notes: Provide details about the activity. This information will display on your To Do page.
Direct Mail Step
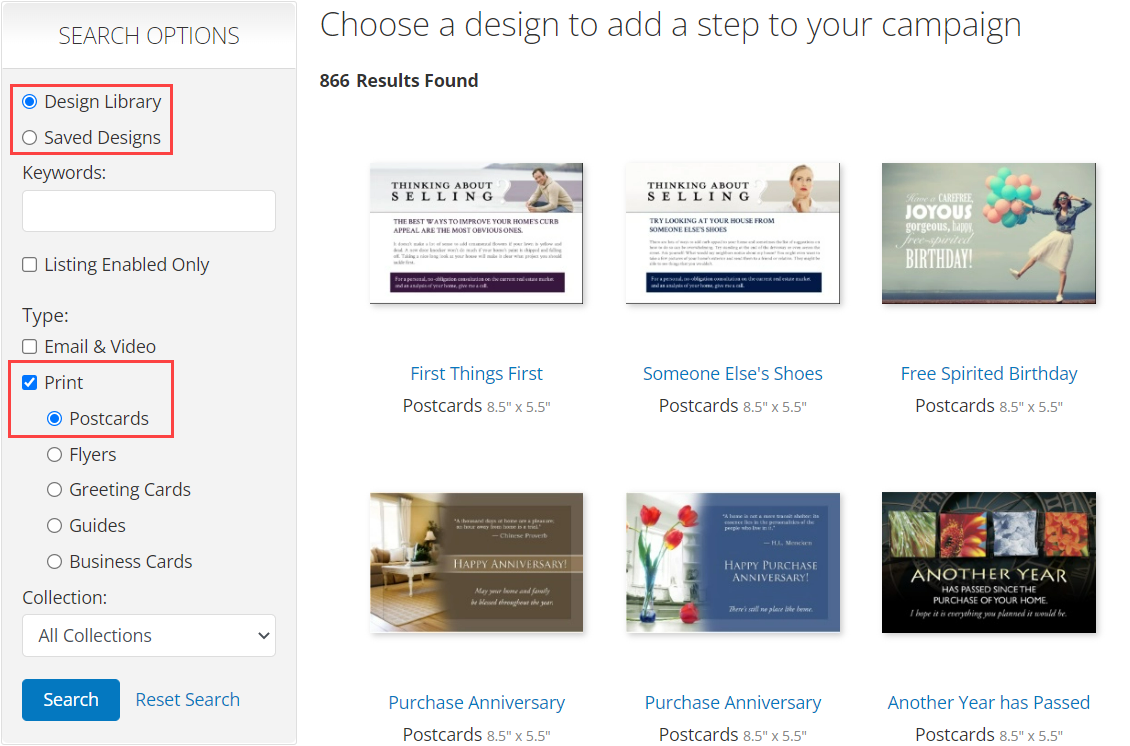
When you select Direct Mail as the step you would like to add, you will be taken to your Marketing Center. The design library will be pre-filtered to show only campaign enabled Postcards. Postcards are the only material type you can add to a campaign for direct mail.
You can choose to add:
- A new direct mail piece
- A saved direct mail piece
Before walking through how to add a direct mail piece, we’ll show you how to filter the available marketing pieces.
Filter Direct Mail Pieces
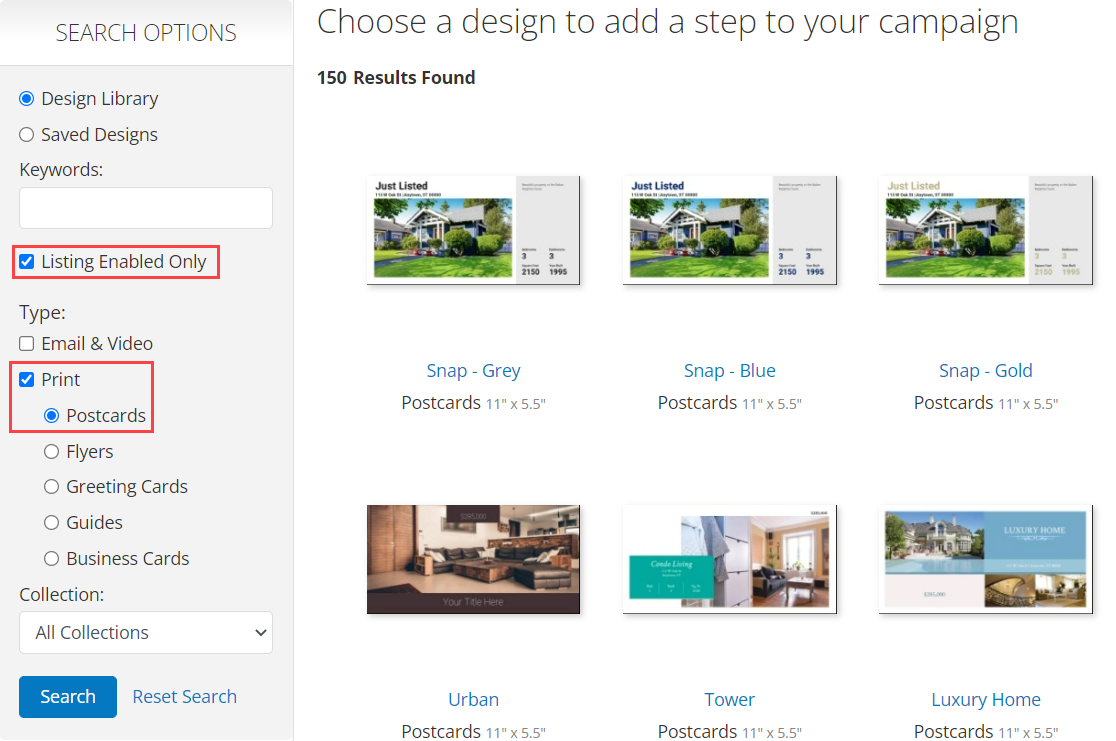
To show only pieces that pull in your active MLS listing information, mark the check box next to Listing Enabled Designs Only.

You can also search by keyword or title, or select the Collection drop down menu to filter by collection.
If you filter by collection, then you will only see pieces for that Collection. A collection is a group of similarly themed designs.
When finished, click Search.
To add a new direct mail piece
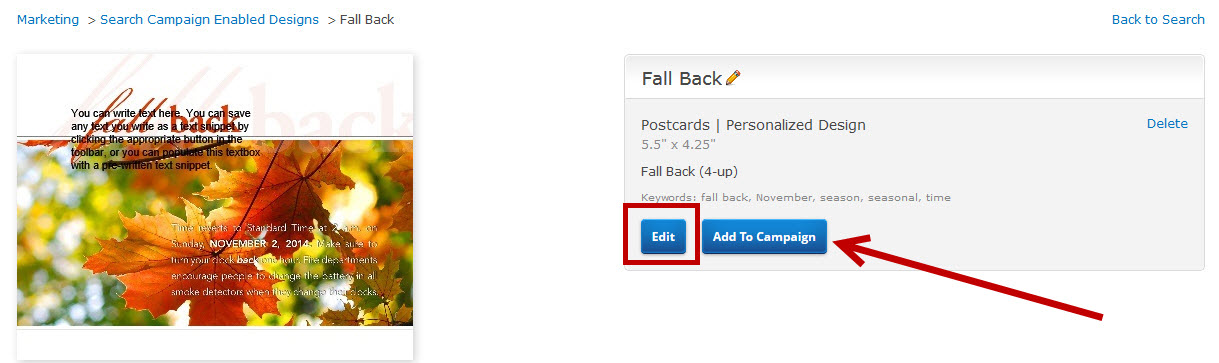
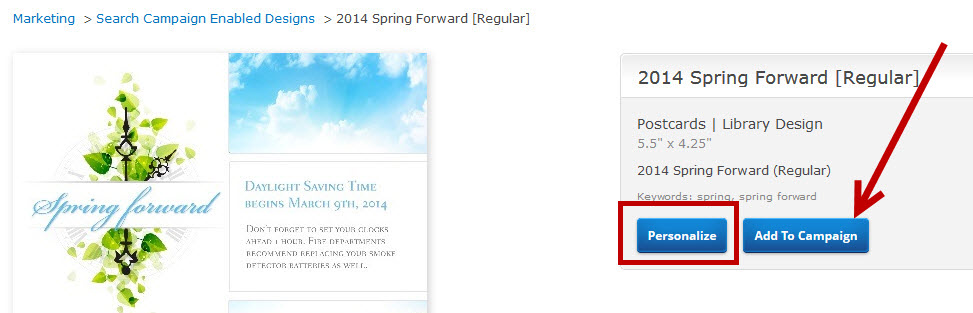
Once you find the design you would like to add, click on the image and you’ll be on the detail page for that design.
To add the design to the campaign without any edits, click Add to Campaign.
To customize the design before adding it to your campaign, click Personalize. You will be taken into the marketing design editor.

The page Macro Save a Marketing Design does not exist.
After editing and saving your design, you will be returned to the marketing design details page. To add your saved design to your campaign, click Add to Campaign.
If you would like to make further changes, click Edit.
To add a previously saved direct mail design
To add a direct mail design that you have saved previously, click the My Saved Designs radio button.
You can filter the list further by:
- Showing Listing Enabled Designs only
- Entering a keyword or title for one of your saved designs
Click the image for the design you want to add and you’ll be taken to the detail page. To make changes to this design, click Edit.
To add the design with no changes, click Add to Campaign.
Re-Order Your Campaign Steps
As you are adding campaign steps, you can choose to re-order them, changing the order that they are sent out in.
To change the order of an interval campaign, you'll use a simple drag-and-drop method.
To change the order of a date campaign, you'll simply change the scheduled date for each campaign piece.
Interval Campaign
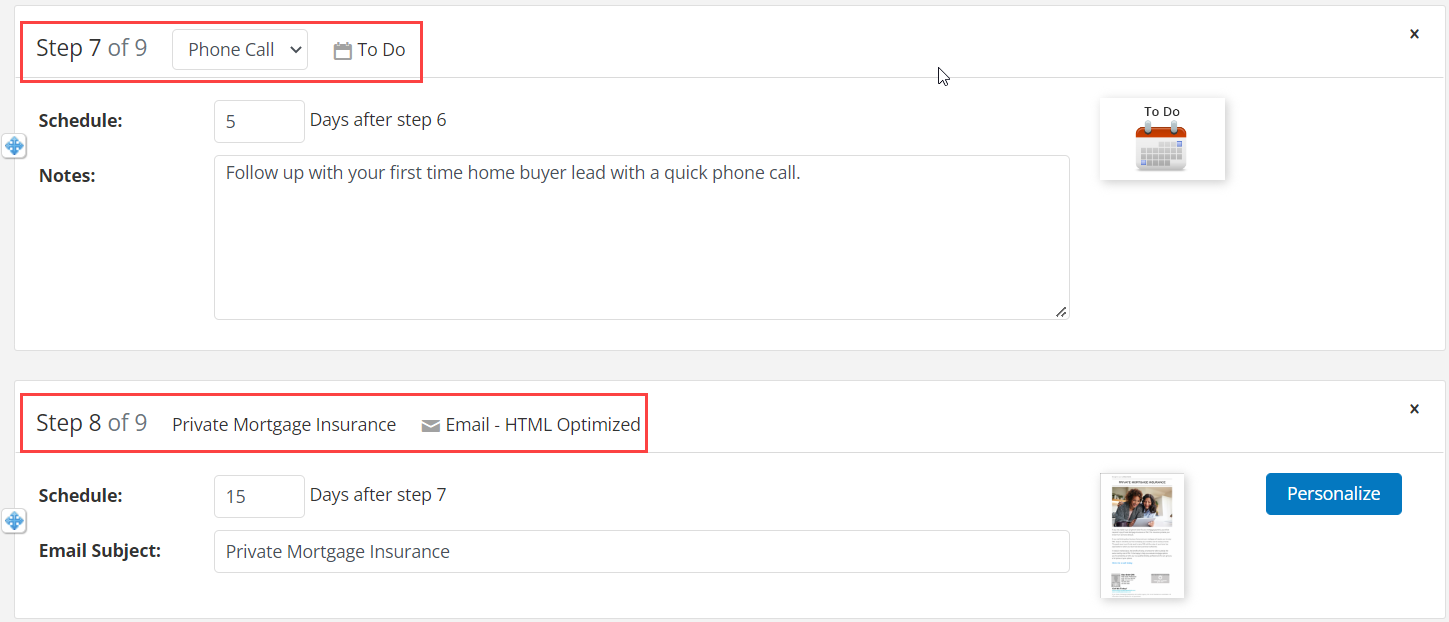
To change the campaign step order of an interval campaign, hover your mouse over the blue move icon at the left side of the row.

When your mouse icon changes to a white move icon, click and hold down with your mouse. Then, drag the step until it is where you want it and release your mouse.
As you move a step past other steps, each will shift either up or down, creating a space for you to place the one you are moving.
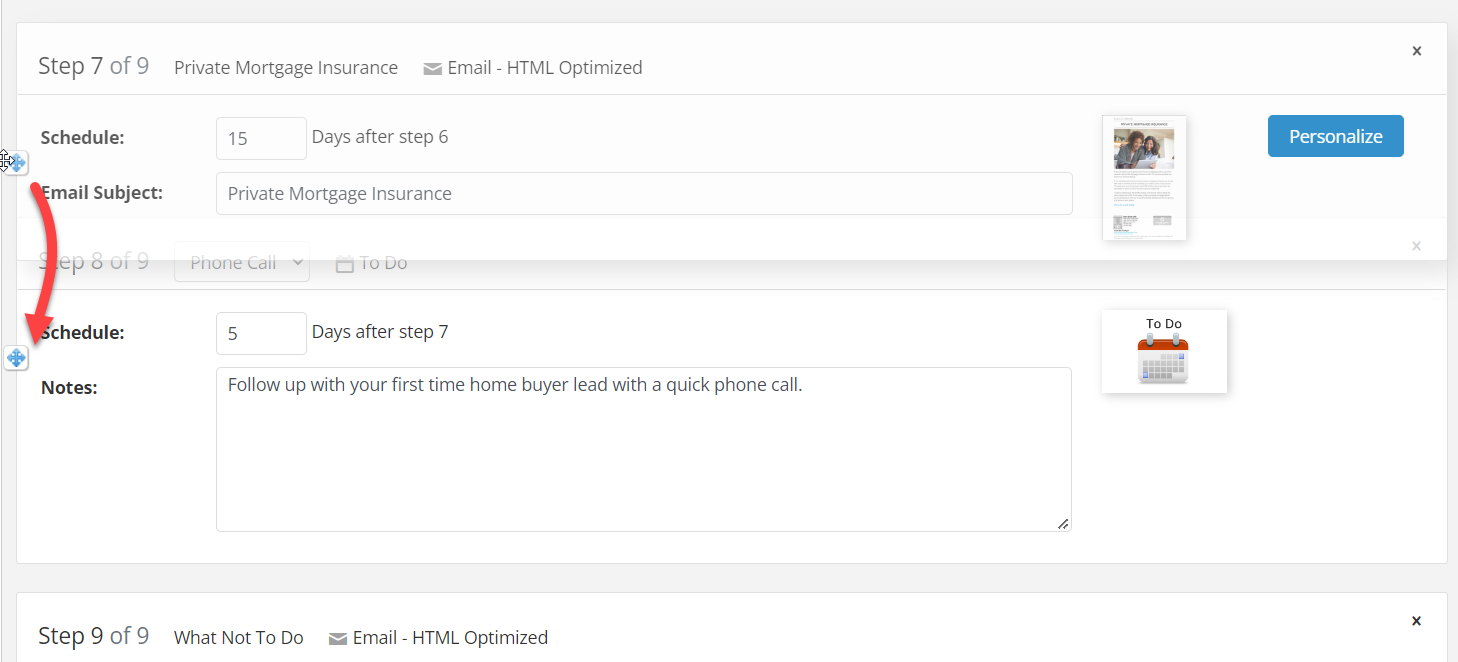
When you let go of your mouse, the step numbers and schedule will change.
Date Campaign
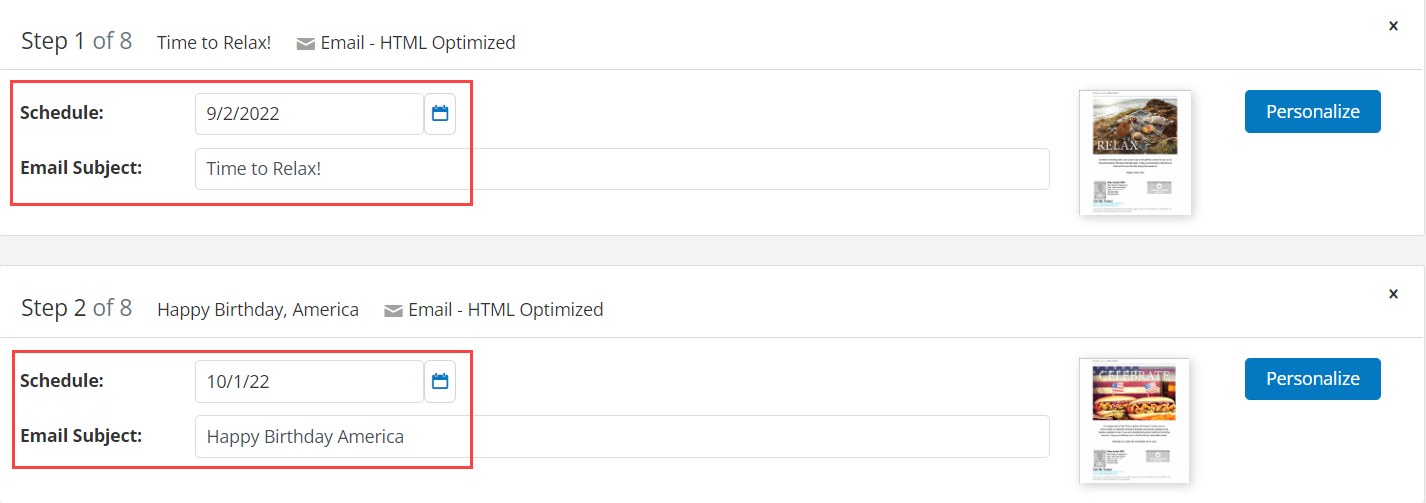
To change the campaign step order of a date campaign, click into the Schedule field for the piece you want to move. A calendar will open up.
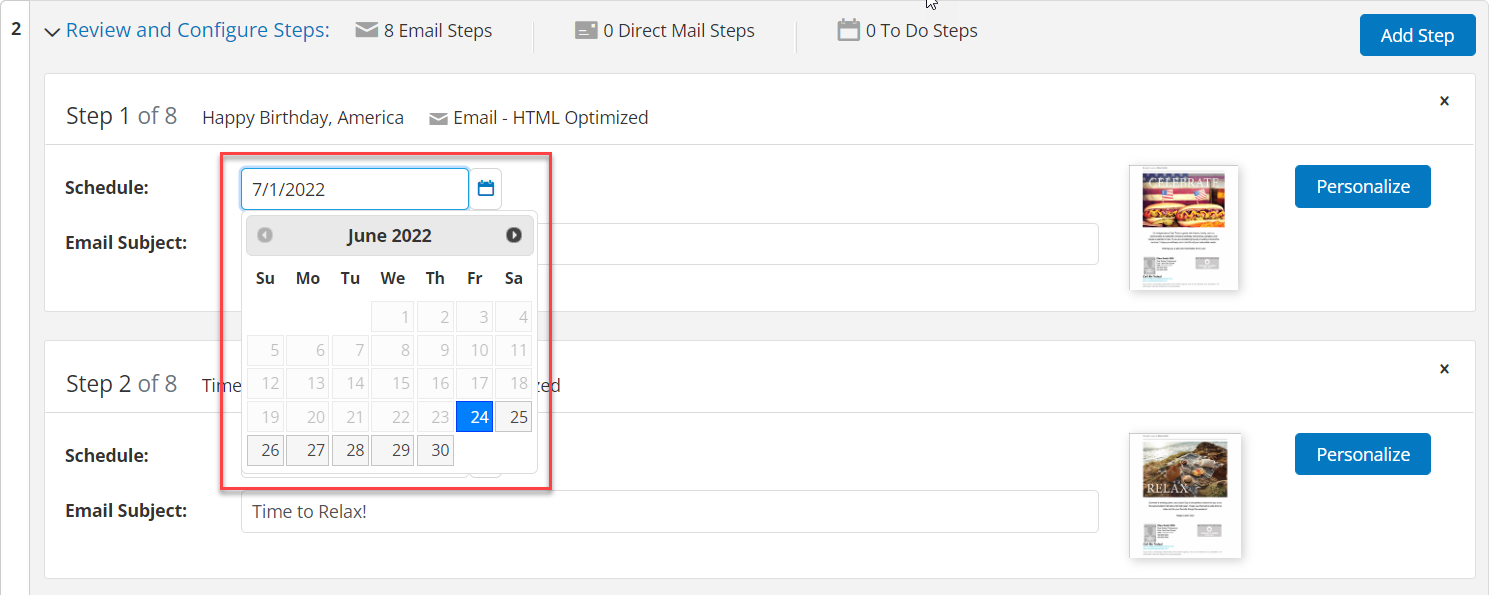
Select a new delivery date by clicking on the date in the calendar. The Schedule field will change to the new date.

When you save your campaign, the steps will re-order based upon the new delivery dates you selected.
Save Your Campaign
When you have finished making changes to your campaign steps, click Save & Continue, at the bottom of the step list.
If you’ve been adding or editing steps as part of an already active campaign, you’ll see a message when you select Save & Continue that reminds you to review and activate your campaign again.

Activate Your Campaign
To activate a campaign, expand the Review and Activate section of the campaign. From here, you must check the opt-in confirmation box, then click Activate.
Helpful Tips
- If a saved design says “No Longer Accessible”, then that template has been retired and is no longer available for use.