Table of Contents
Edit a Saved Campaign
Each saved campaign is identified by a row on the Manage Campaigns page.
To edit a campaign, click Edit below the campaign status.

Change Your Campaign Name
Select Section 1 if you want to rename your campaign, then, click Save & Continue.

You’ll see a confirmation at the top of the screen, showing the name has been changed. You’ll also notice that the text for Section 1 now shows the new campaign name.

Edit Existing Steps or Add New Steps
Edit Existing Steps
To see the existing steps, click anywhere on the row for Section 2 to expand it.
To edit an existing step, click the Edit or Personalize button. You’ll then be taken to the marketing design editor.

Delete a Campaign Step
To remove a campaign step, click the X for that campaign step.

Confirm you want to delete the step by clicking Yes, Delete Step.

Add Additional Campaign Steps
To add additional campaign steps, click Add Step.

Select which type of step you would like to add.
- Email steps
- Activity steps
- Direct Mail steps
Then, click Add Step.

Email Step
When you select Email as the step you would like to add, you will be taken to your Marketing Center. You’ll be able to view all campaign enabled designs, which will already be filtered to show only Email materials.
You can choose to add:
- A new email design
- A saved email design

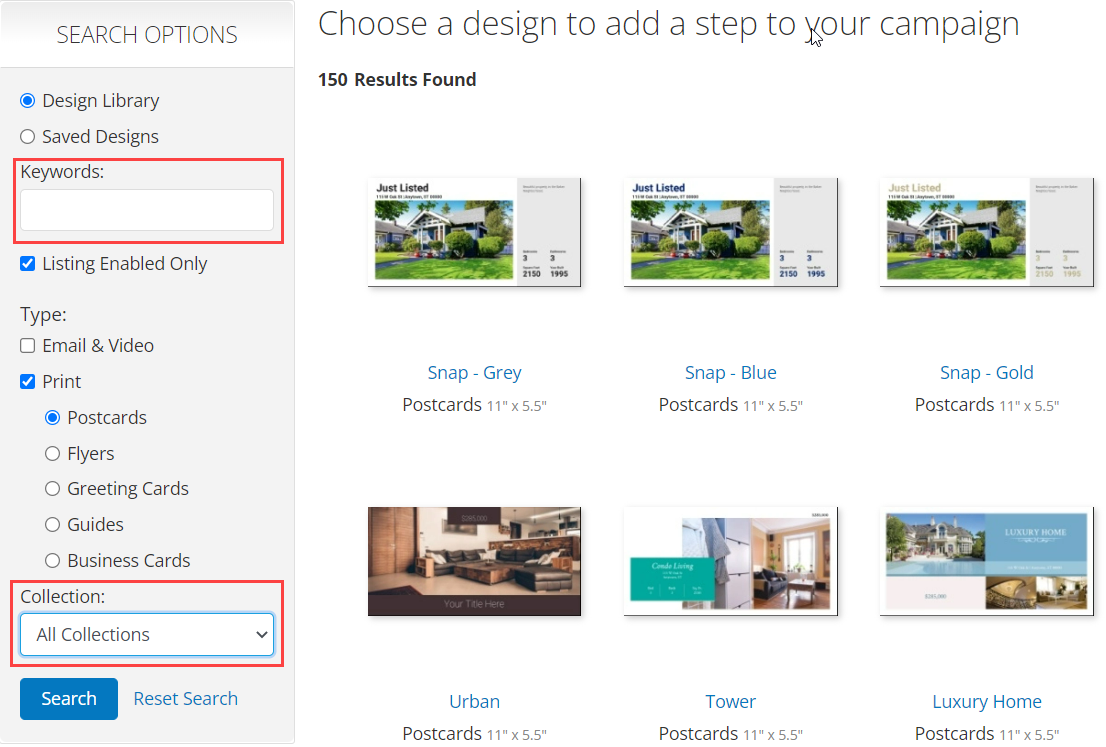
Narrow your search with the Search Options box. This will let you filter your results by keyword or title and/or Collection. When finished, select Search. A collection is a group of similarly themed designs.

Add a New Email
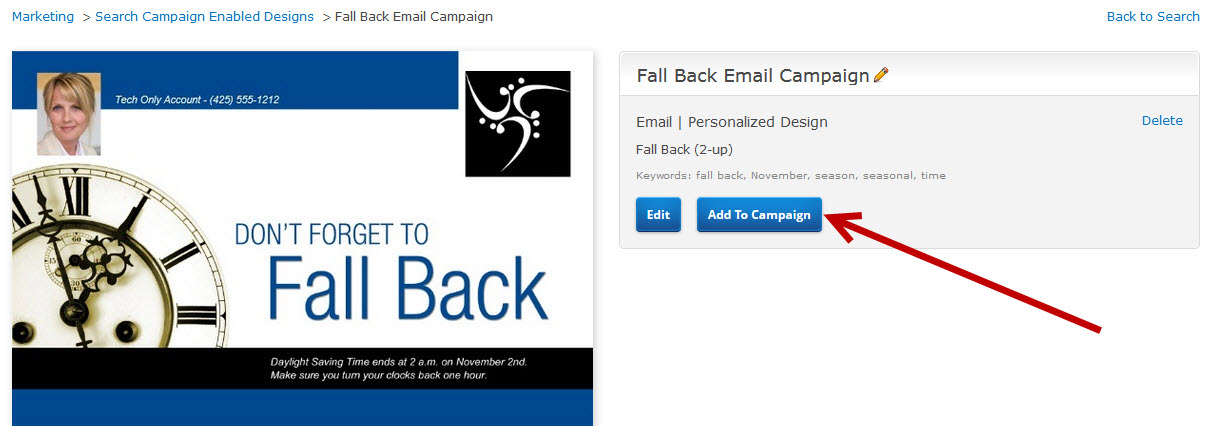
When you see an email design that you want to use, click the image for the email design and you’ll be taken to the detail page for that design.
To add this step to the campaign without any edits, click Add to Campaign.
To customize the design before adding it to your campaign, click Personalize. You will be taken into the marketing design editor.

The page Macro Save a Marketing Design does not exist.
After editing and saving your design, you will be returned back to this page where you can now add your saved design to your campaign. Click Add to Campaign.

Add a Previously Saved Email Design
To add an email design that you have saved previously, click the My Saved Designs radio button.
You can filter the list further by:
- Showing Listing Enabled Designs only
- Entering a keyword or title for one of your saved designs
Click Search to view the results.

Click the image for the design you want to add and you’ll be taken to the detail page. To make changes to this design, click Edit.
To add the design to your campaign with no changes to the design, click Add to Campaign.

Activity Step
When you add an Activity step, the activity will be added to the end of your campaign as a default. You’ll be able to identify if this activity is a:
- Task
- Meeting
- Phone Call
Each activity type will trigger a reminder, which will appear on your Dashboard as well as on your To Do page.
Choose a reminder type based on whether or not you want the activity to be tied to a specific contact.
- Task: general reminder, not tied to a particular contact
- Meeting: reminder is tied to a specific contact
- Phone Call: reminder is tied to a specific contact
In general, if you want to schedule a reminder for yourself to do something, choose task. If you want to be reminded to do something with specific contacts on a campaign, choose meeting or phone call.

Each activity will have:
- Schedule: Day/date the piece is scheduled to be sent
- Date campaign: The date of the activity
- Interval campaign: Number of days after the prior campaign step this activity will occur
- Subject: Give your activity a subject. Ex. “2
Day Phone Call” - Notes: Provide details about the activity. This information will display on your Reminders page.
Direct Mail Step
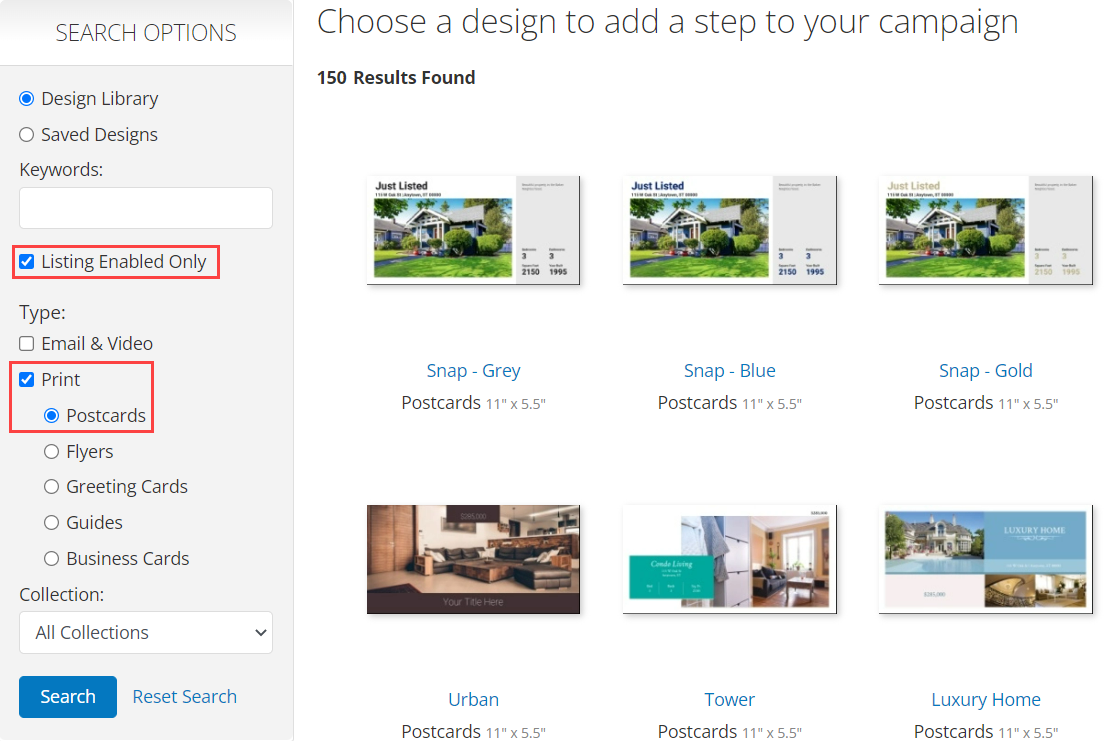
When you select Direct Mail as the step you would like to add, you will be taken to your Marketing Center. The design library will be pre-filtered to show only campaign enabled Postcards. Postcards are the only material type you can add to a campaign for direct mail.
You can choose to add:
- A new direct mail piece
- A saved direct mail piece

Before walking through how to add a direct mail piece, we’ll show you how to filter the available marketing pieces.
Filter Direct Mail Pieces
To show only pieces that pull in your active MLS listing information, mark the check box next to Listing Enabled Designs Only.

You can also search by keyword or title, or select the Collection drop down menu to filter by collection.
If you filter by collection, then you will only see pieces for that Collection. A collection is a group of similarly themed designs.
When finished, click Search.

Add a New Direct Mail Piece
Once you find the design you would like to add, click on the image and you’ll be on the detail page for that design.
To add the design to the campaign without any edits, click Add to Campaign.
To customize the design before adding it to your campaign, click Personalize. You will be taken into the marketing design editor.

The page Macro Save a Marketing Design does not exist.
After editing and saving your design, you will be returned to the marketing design details page. To add your saved design to your campaign, click Add to Campaign.
If you would like to make further changes, click Edit.

Add a Previously Saved Direct Mail Design
To add a direct mail design that you have saved previously, click the My Saved Designs radio button.
You can filter the list further by:
- Showing Listing Enabled Designs only
- Entering a keyword or title for one of your saved designs

Click the image for the design you want to add and you’ll be taken to the detail page. To make changes to this design, click Edit.
To add the design with no changes, click Add to Campaign.

Add or Remove Contacts
To remove a contact from a campaign:
- If they were added via a group membership, you can only remove them from the campaign by removing them from the group.
- If they were added individually, you can remove them individually from either the contact summary, or from the campaign you are removing them from.
Review and Activate Campaign
To activate a campaign, expand the Review and Activate section of the campaign. From here, you must check the opt-in confirmation box, then click Activate.
Pause or Delete Campaign
To pause or delete a campaign, expand the Review and Activate section of the campaign. From here, you can click Pause, or click Delete.

